Welcome to our blog post all about the Can-Am X3 transmission! If you’re a fan of off-roading and own a Can-Am X3, understanding the ins and outs of its transmission is vital for a smooth and powerful ride.
In this article, we’ll guide you through everything you need to know, starting with understanding the Can-Am X3 transmission and common signs of transmission problems. We’ll then dive into the preparation for a transmission rebuild, followed by a step-by-step rebuilding process. Additionally, we’ll provide you with a list of recommended tools and parts needed for the rebuild. Once the transmission is rebuilt, we’ll discuss the testing and adjustments required before hitting the trails. Lastly, we’ll provide you with some maintenance tips to ensure a longer transmission life. Let’s get started!
Understanding The Can-Am X3 Transmission
The Can-Am X3 is a powerful off-road vehicle that is beloved by many outdoor enthusiasts. Central to the performance of the Can-Am X3 is its transmission system. The transmission, or gearbox, is responsible for transferring the power generated by the engine to the wheels, allowing the vehicle to move. In this blog post, we will delve into the intricacies of the Can-Am X3 transmission, exploring its components, functions, and common issues that may arise.
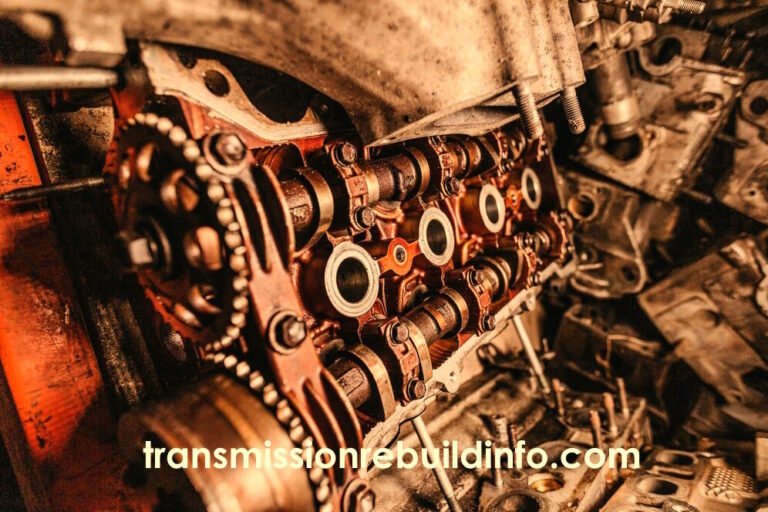
Components of the Can-Am X3 Transmission
The Can-Am X3 transmission is a complex piece of machinery comprised of various components, each with its own essential role. One of the key elements is the gearbox itself, which houses the gears responsible for transmitting power. These gears, also known as drive gears or pinions, mesh together to transfer rotational force from the engine to the wheels. Another critical component is the clutch system, which allows for efficient engagement and disengagement of power between the engine and the transmission. Additionally, the Can-Am X3 transmission features a differential, which splits the power evenly between the front and rear wheels, ensuring optimal traction.
Functions of the Can-Am X3 Transmission
The primary function of the Can-Am X3 transmission is to ensure that power from the engine is transferred to the wheels in the most efficient and effective way possible. This is achieved through the use of different gear ratios, which allow the vehicle to operate at varying speeds and torque levels. Additionally, the transmission system allows for smooth shifting between gears, enabling the driver to maintain control and maximize performance. It is important to note that the Can-Am X3 transmission is specifically designed for off-road usage, taking into account the unique demands and challenges that come with tackling rugged terrain.
Common Issues and Rebuilding
Like any mechanical system, the Can-Am X3 transmission is not immune to issues and wear over time. Signs of transmission problems can include gear slipping, difficulty shifting, strange noises, or leaking fluid. In such cases, a transmission rebuild may be necessary to restore optimal performance. A transmission rebuild involves disassembling the transmission, inspecting each component for damage or wear, and replacing any faulty parts. It is a meticulous process that requires technical expertise and the use of appropriate tools. By following a step-by-step rebuilding process and utilizing recommended tools and parts, owners can ensure that their Can-Am X3 transmission is restored to its full potential.
In conclusion, understanding the Can-Am X3 transmission is essential for any owner or enthusiast of this off-road vehicle. By familiarizing oneself with its components, functions, and potential issues, one can better appreciate the role it plays in delivering power to the wheels. Regular maintenance and proper care, including testing and adjustments after a rebuild, can contribute to a longer transmission lifespan. With this knowledge at hand, Can-Am X3 owners can confidently tackle challenging adventures with the assurance that their transmission is in optimal condition.
Signs Of Transmission Problems
As a vehicle owner, it is important to be aware of the signs that indicate potential transmission problems in your Can-Am X3. Recognizing these signs early on can help prevent further damage and expensive repairs down the road. Here are a few key indicators that may suggest you are experiencing transmission issues:
1. Warning lights: If you notice any warning lights illuminated on your dashboard, particularly the “Check Engine” light or the transmission temperature warning light, it could be an indication of a problem with your transmission. Modern vehicles are equipped with sophisticated diagnostic systems that can detect various issues in real-time, providing valuable information for identifying potential transmission problems.
2. Unusual noises: Pay attention to any unusual noises coming from your Can-Am X3’s transmission. These may include whining, grinding, or clunking sounds while shifting gears or while the vehicle is in neutral. Such noises can be indicative of worn-out gears, faulty bearings, or transmission fluid issues.
3. Fluid leaks: Keep an eye out for any fluid leaks underneath your vehicle. Transmission fluid is essential for smooth gear shifting and cooling the transmission system. If you notice red or brown fluid pooling beneath your Can-Am X3, it is likely a sign of a leak, which should be addressed promptly to prevent further damage to the transmission.
4. Difficulty shifting gears: Another common sign of transmission problems is difficulty in shifting gears. If you experience resistance, delays, or slipping gears when using the clutch or gearshift, it could indicate worn-out clutch plates, damaged synchros, or an issue with the transmission fluid. Prompt attention is necessary to avoid more severe damage to the transmission system.
5. Burning smell: A burning smell, particularly when accompanied by smoke, is a strong indication of overheating transmission fluid. This can be caused by low fluid levels, excessive friction, or a malfunctioning transmission cooler. If you notice a burning odor, it is crucial to inspect and address the issue immediately.
6. Transmission slipping: If you notice sudden RPM increases without a proportional increase in speed or delayed acceleration, your transmission may be slipping. This occurs when the transmission fails to engage or maintain the intended gear due to worn-out internal components or insufficient transmission fluid pressure.
7. Vibration or shaking: Excessive vibration or shaking felt while driving, especially when shifting gears or accelerating, may suggest a problem with the transmission. Damaged or worn-out transmission mounts, unbalanced drive shafts, or issues with the torque converter can all contribute to these symptoms.
Being attentive to these signs can help you detect transmission problems early on and seek professional assistance before they worsen. Regular maintenance, such as fluid checks and changes according to the manufacturer’s guidelines, can also help prevent transmission issues. Remember, if you suspect any problems with your Can-Am X3 transmission, it is always best to consult a qualified mechanic or transmission specialist for an accurate diagnosis and necessary repairs.
Preparation For A Transmission Rebuild
When it comes to the Can-Am X3 transmission, regular maintenance and proper care are essential to ensure its longevity and optimal performance. However, even with the best care, there may come a time when a transmission rebuild is necessary. Whether you are a seasoned mechanic or a passionate off-roader looking to tackle this project on your own, proper preparation is key to a successful rebuild.
First and foremost, before beginning any work on your Can-Am X3 transmission, it is crucial to have a clear understanding of the intricacies of this complex system. Familiarize yourself with the transmission’s components, their functions, and how they interact with one another. This foundational knowledge will enable you to approach the rebuild process confidently and efficiently.
Next, gather all the necessary tools and parts required for the transmission rebuild. This includes but is not limited to socket wrenches, screwdrivers, torque wrenches, a transmission jack, and a rebuilding kit specific to your Can-Am X3 model. Investing in high-quality tools and genuine OEM (Original Equipment Manufacturer) parts is highly recommended to ensure a successful rebuild and the longevity of your transmission.
- Socket wrenches
- Screwdrivers
- Torque wrenches
- Transmission jack
- Rebuilding kit
Before diving into the rebuild process, it is essential to have a well-organized workspace. Clean and prepare a dedicated area where you can safely disassemble and rebuild the transmission. Ensure you have sufficient lighting, ventilation, and enough space to lay out the transmission components without the risk of misplacing or damaging any vital parts.
Lastly, take the time to thoroughly clean all the transmission parts before beginning the rebuild. Use a parts cleaner or an appropriate solvent to remove any dirt, debris, or old lubricant. Cleaning the parts not only helps identify any potential issues or wear but also ensures that the rebuilt transmission functions properly and performs at its best.
| Benefits of preparation: | Challenges of inadequate preparation: |
|---|---|
| • Ensures a smooth rebuild process• Reduces the risk of errors and mistakes• Saves time and effort in the long run• Increases the life expectancy of the rebuilt transmission | • Increased risk of damaging transmission components• Higher chance of rework due to missed steps• Potential for premature transmission failure• Longer downtime for the Can-Am X3 |
In conclusion, preparation is key when undertaking a Can-Am X3 transmission rebuild. By gaining a solid understanding of the transmission system, acquiring the necessary tools and parts, creating an organized workspace, and ensuring the cleanliness of the transmission components, you are setting yourself up for a successful and efficient rebuild process. Remember, taking the time to prepare properly can save you from potential headaches and future transmission issues.
Step-By-Step Rebuilding Process
When it comes to rebuilding the transmission of a Can-Am X3, a step-by-step process is crucial to ensure a successful outcome. Rebuilding the transmission not only allows for a cost-effective solution but also provides an opportunity to understand the inner workings of the vehicle. It is important to approach this task with precision and attention to detail, as any mistakes can lead to further issues down the line.
The first step in the rebuilding process is to gather all the necessary tools and parts. This includes a transmission rebuild kit specifically designed for the Can-Am X3, as well as any additional tools required for disassembling and reassembling the transmission. It is important to take note of the instructions provided with the kit, as different rebuild kits may have variations in the rebuilding process.
Once all the tools and parts are ready, the next step is to remove the transmission from the vehicle. This involves disconnecting the battery and draining the transmission fluid to prevent any leaks or spills. Care should be taken to support the transmission properly using a transmission jack or other means to prevent damage or injury during the removal process.
- Label and disconnect all electrical connectors, sensors, and linkages connected to the transmission. Take note of their positions before removal to ensure proper reassembly.
- Remove the torque converter bolts and carefully separate the transmission from the engine.
- With the transmission removed, it is now time to disassemble the transmission. This step requires careful attention to detail, as each component should be inspected for any signs of wear, damage, or contamination. The gears, bearings, seals, and other components should be carefully removed and organized, ensuring that they can be easily reassembled later.
After disassembling the transmission, it is time to clean each component thoroughly. This is an important step in the rebuilding process, as any dirt or debris left on the components can lead to further damage or failure. Each component should be cleaned using appropriate cleaning agents and tools, paying close attention to hard-to-reach areas.
| Component | Cleaning Method |
|---|---|
| Gears and Shafts | Soak in a cleaning solution and use a brush to remove any debris. |
| Bearings | Clean using a solvent and ensure they are free from any dirt or contaminants. |
| Seals and O-rings | Inspect for any signs of wear or damage and replace if necessary. |
Once all the components are cleaned, the next step is to replace any worn or damaged parts with new ones from the rebuild kit. This includes replacing seals, gaskets, bearings, and any other necessary components. It is important to follow the instructions provided with the rebuild kit to ensure proper installation of these parts.
Once all the new parts are installed, it is time to reassemble the transmission. This should be done carefully, following the reverse order of the disassembly process. It is crucial to pay attention to proper alignment and tightening of bolts, as incorrect installation can lead to issues in the future.
After the transmission is reassembled, it is essential to test and adjust its performance. This includes checking the fluid levels, conducting a road test to ensure smooth shifting, and making any necessary adjustments to the linkage or controls.
In summary, the step-by-step rebuilding process for a Can-Am X3 transmission involves gathering the necessary tools and parts, removing the transmission from the vehicle, disassembling and cleaning the components, replacing any worn or damaged parts, reassembling the transmission, and finally testing and adjusting its performance. By following this process meticulously, one can ensure a successful transmission rebuild and a reliable vehicle.
Recommended Tools And Parts
When it comes to performing a transmission rebuild on your Can-Am X3, having the right tools and parts is essential for a successful and efficient process. The transmission rebuild is a complex procedure that requires attention to detail and the use of specific tools and parts designed for this particular make and model. In this blog post, we will discuss the recommended tools and parts that are necessary for a smooth and effective transmission rebuild.
One of the most crucial tools for a Can-Am X3 transmission rebuild is a quality torque wrench. This tool is essential for properly tightening the various bolts and screws involved in the process. A torque wrench ensures that the fasteners are tightened to the manufacturer’s specifications, preventing any potential issues or damage down the line. It is recommended to invest in a torque wrench with a wide range of torque settings to accommodate the different specifications for different components of the transmission.
In addition to a torque wrench, a comprehensive socket set is also essential for a transmission rebuild. The socket set should include a variety of socket sizes, extensions, and ratchets to provide versatility and ease of access to hard-to-reach areas. The transmission consists of numerous bolts and nuts of varying sizes, so having a complete socket set will ensure that you have the right tool for every fastener.
| Recommended Tools | Recommended Parts |
|---|---|
|
|
Another essential tool for a Can-Am X3 transmission rebuild is a screwdriver set. The screwdriver set should include both flat and Phillips head screwdrivers of various sizes. These tools will be needed to remove and install screws and other fasteners throughout the process. It is important to ensure that the screwdrivers have a comfortable grip and are made of durable materials to avoid any potential slips or damages.
An impact gun can also be a valuable tool to have during a transmission rebuild. This power tool can quickly and efficiently remove stubborn bolts and nuts, where manual methods may prove difficult or time-consuming. However, it is crucial to exercise caution and follow the manufacturer’s recommendations when using an impact gun to prevent overtightening and potential damage to delicate transmission components.
Lastly, a bearing puller can be an invaluable tool for removing bearings without causing any damage. During a transmission rebuild, there may be instances where bearings need to be replaced or inspected. A bearing puller allows for their removal without the risk of deformation or destruction, ensuring a proper rebuild.
When it comes to the recommended parts for a Can-Am X3 transmission rebuild, it is crucial to use high-quality components that are specifically designed for this vehicle. These parts include a transmission rebuild kit, clutch kit, gasket and seal kit, transmission fluid, and a filter. Using OEM or reputable aftermarket parts will ensure the longevity and overall performance of the transmission after the rebuild.
In conclusion, the recommended tools and parts discussed in this blog post are essential for a successful Can-Am X3 transmission rebuild. Having the right tools, such as a torque wrench, socket set, screwdriver set, impact gun, and bearing puller, will provide you with the necessary means to perform the rebuild effectively. Additionally, using high-quality parts, including a transmission rebuild kit, clutch kit, gasket and seal kit, transmission fluid, and a filter, will help enhance the longevity and performance of your transmission. When embarking on a transmission rebuild, having the proper tools and parts is key to achieving optimal results.
Testing And Adjustments After Rebuild
After successfully completing a transmission rebuild on your Can-Am X3, it is important to perform thorough testing and make necessary adjustments to ensure optimal performance and longevity. This post will guide you through the essential steps for testing and making adjustments after a rebuild, helping you achieve a smooth and efficient transmission operation.
1. Test for Gear Engagement: Start by manually shifting through each gear to ensure smooth engagement without any slippage or grinding. Pay attention to any unusual noises or vibrations. If you detect any issues, adjustments may be needed.
2. Adjust Shift Linkage: Next, inspect and adjust the shift linkage to guarantee accurate gear selections. Improperly adjusted shift linkage can result in misalignment and difficulty shifting gears. Follow the manufacturer’s instructions or consult a service manual to correctly adjust the linkage.
3. Monitor Fluid Levels and Condition: Check the transmission fluid level and condition using the dipstick or inspection plug. The fluid should be at the recommended level and appear clean without any signs of contamination or discoloration. Add or replace fluid if necessary.
- Inspect Transmission Cooler: Inspect the transmission cooler for any blockages or damage. Clear any debris and ensure proper airflow to prevent overheating.
- Perform a Road Test: Take your Can-Am X3 for a test drive to evaluate its performance. Pay attention to gear shifts, acceleration, and general transmission operation. Take note of any abnormal behavior or performance issues.
| Issue | Possible Cause | Action |
|---|---|---|
| Grinding or Clunking Noise | Misaligned gears or improper gear engagement | Recheck gear alignment and adjust as necessary |
| Slipping Gears | Worn clutch plates or incorrect clutch adjustment | Inspect and replace clutch plates if necessary; adjust clutch as per manufacturer’s specifications |
| Fluid Leaks | Loose or damaged seals, gaskets, or o-rings | Tighten or replace seals, gaskets, or o-rings; ensure proper torque on fasteners |
| Delayed or Jerky Shifts | Incorrect transmission fluid level or condition | Adjust or replace transmission fluid to the appropriate level and quality |
By performing these tests and adjustments meticulously, you can address any potential issues and ensure a properly functioning transmission after a rebuild. Regular maintenance and monitoring are also essential for prolonging the life of your Can-Am X3 transmission, so make sure to follow the manufacturer’s recommended maintenance schedule and guidelines.
Maintenance Tips For A Longer Transmission Life
Maintenance is a critical aspect when it comes to ensuring a longer life for your Can-Am X3 Transmission. By implementing some simple yet effective tips, you can significantly reduce the risk of transmission problems and keep your vehicle running smoothly for years to come.
Regular Fluid Checks and Changes: One of the most important maintenance tasks for your transmission is to regularly check and change the fluid. Transmission fluid plays a crucial role in lubricating moving parts and cooling the transmission. Over time, the fluid can become contaminated or break down, resulting in poor performance and potential damage to the transmission. Regular fluid checks and changes, as recommended by the manufacturer, can help maintain optimal transmission function.
Proper Cooling System Management: Another key maintenance tip is to ensure proper cooling system management for your transmission. Excessive heat can cause severe damage to the transmission, leading to costly repairs or even transmission failure. Make sure the cooling system is properly maintained and functioning correctly. This includes checking coolant levels, replacing worn-out coolant, and inspecting the radiator for any clogs or leaks. Additionally, consider installing an external transmission cooler for added cooling capacity in extreme conditions.
Regular Inspection and Adjustment: Routine inspection and adjustment of the transmission can prevent minor issues from escalating into major problems. It is crucial to inspect the transmission for any signs of leaks, damage, or abnormal wear. Also, pay attention to any unusual noises, vibrations, or shift delays, as these can indicate potential transmission issues. If you notice any problems, it is essential to address them promptly by seeking professional assistance. Regular adjustments, such as tightening loose bolts or cables, can help maintain the transmission’s performance and extend its lifespan.
Driving Habits and Techniques: Lastly, your driving habits and techniques play a significant role in the longevity of your transmission. Avoid excessive towing, hauling heavy loads, or aggressive driving, as these can put unnecessary strain on your transmission. Smooth acceleration and deceleration, along with proper gear shifting, can help reduce wear and tear on the transmission components. Additionally, make a habit of warming up your vehicle before driving in cold weather to allow the transmission fluid to circulate effectively.
- Regular fluid checks and changes – Maintain optimal transmission function.
- Proper cooling system management – Prevent overheating and potential damage.
- Regular inspection and adjustment – Identify and address issues promptly.
- Driving habits and techniques – Reduce strain on the transmission.
| Maintenance Tips for a Longer Transmission Life | |
|---|---|
| Regular fluid checks and changes | Ensure proper cooling system management |
| Regular inspection and adjustment | Adopt good driving habits and techniques |
Frequently Asked Questions
1. What are some common signs of transmission problems in a Can-Am X3?
Common signs of transmission problems in a Can-Am X3 include slipping gears, delayed or harsh shifting, strange noises, and leaking fluids.
2. How do I know if my Can-Am X3 transmission needs to be rebuilt?
Your Can-Am X3 transmission may need to be rebuilt if you experience severe transmission issues that cannot be fixed with basic repairs, such as worn-out gears, damaged seals, or internal component failure.
3. What is involved in the preparation for a transmission rebuild?
Preparation for a transmission rebuild includes gathering the necessary tools and parts, draining the transmission fluid, removing the transmission from the vehicle, and inspecting all components for damage or excessive wear.
4. Can you explain the step-by-step rebuilding process for a Can-Am X3 transmission?
The step-by-step rebuilding process for a Can-Am X3 transmission involves disassembling the transmission, cleaning all parts, replacing worn or damaged components, reassembling the transmission, and properly torquing all bolts and fasteners.
5. What tools and parts are recommended for a Can-Am X3 transmission rebuild?
Recommended tools for a Can-Am X3 transmission rebuild include a torque wrench, socket set, pliers, snap ring pliers, and a transmission jack. Recommended parts may include gaskets, seals, clutch plates, and bearings.
6. How should I test and adjust my Can-Am X3 transmission after a rebuild?
After a Can-Am X3 transmission rebuild, it is important to perform a thorough test drive to ensure proper functionality. Any necessary adjustments to the shift linkage and fluid levels should be made during this process.
7. What maintenance tips can help prolong the life of a Can-Am X3 transmission?
To prolong the life of your Can-Am X3 transmission, it is recommended to regularly check and change the transmission fluid, avoid excessive towing or hauling, and have the transmission inspected by a professional at regular intervals.