Welcome to our comprehensive guide on transmission rebuild! Whether you’re an automotive enthusiast or simply curious about the inner workings of your vehicle, understanding the basics of transmission rebuild is essential knowledge. In this blog post, we will walk you through the process of determining if your transmission requires a rebuild, gathering the necessary tools and equipment, step-by-step instructions on disassembling the transmission, inspecting and evaluating the components, and finally, rebuilding and testing the transmission for optimal performance and functionality. Join us as we delve into the intricacies of this complex but rewarding automotive endeavor.
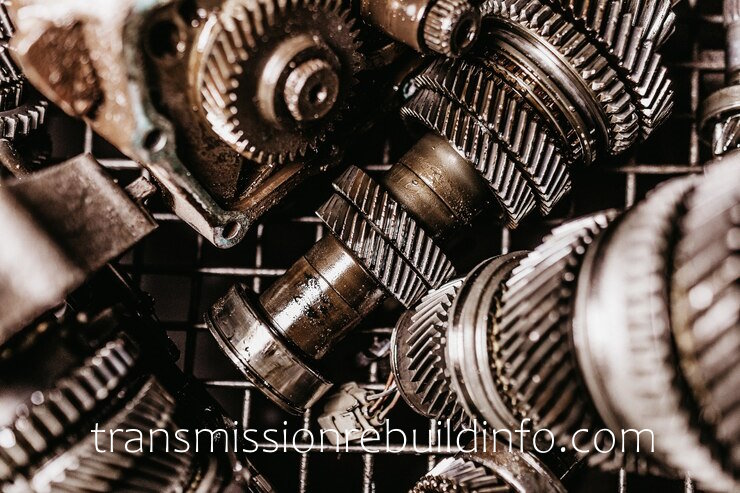
Understanding The Basics Of Transmission Rebuild
Understanding The Basics Of Transmission Rebuild
A transmission rebuild is a major repair that involves disassembling, inspecting, and replacing various components of the transmission to restore its functionality. It is necessary when the transmission is experiencing significant issues such as slipping, grinding, or failing to shift properly. Understanding the basics of transmission rebuild can help car owners make informed decisions and potentially save money by performing the task themselves or having a better understanding when discussing the repair with a professional technician.
One of the first steps in rebuilding a transmission is determining the need for it. Signs that a transmission rebuild may be required include unusual noises, difficulty shifting gears, or a burning smell. If any of these symptoms are present, it is important to take the vehicle to a qualified mechanic or perform a thorough diagnosis to confirm the need for a rebuild. Once the need is determined, gathering the necessary tools and equipment is essential for a successful rebuild.
When disassembling the transmission, it is crucial to follow a step-by-step guide to ensure precision and avoid damaging any components. Each component should be carefully inspected and evaluated for wear, damage, or signs of failure. The use of strong keywords such as “how to rebuild transmission” can be useful in online searches to find reliable guides or tutorials that provide detailed instructions on the disassembly process.
- Inspecting and evaluating the transmission components is a critical step in the rebuild process. This involves examining the gears, clutches, bearings, and seals for any signs of damage or wear. Components that are worn out or damaged should be replaced with new ones to ensure optimal performance and longevity of the rebuilt transmission.
- Rebuilding the transmission with precision and care is crucial for a successful outcome. This entails assembling the transmission using the correct torque specifications and following the recommended procedures. It is important to pay attention to proper alignment and lubrication throughout the rebuild process to avoid future issues.
- Testing the rebuilt transmission for performance and functionality is the final step in the rebuild process. This involves installing the rebuilt transmission back into the vehicle and conducting road tests to ensure smooth shifting, proper gear engagement, and overall functionality. This step is crucial to verify the success of the rebuild and identify any potential issues that may require further adjustments or repairs.
| Steps | Description |
|---|---|
| Determining the Need | Identify signs and symptoms that indicate the need for a transmission rebuild. |
| Gathering Tools and Equipment | Collect all the necessary tools and equipment required for the rebuild process. |
| Disassembling the Transmission | Follow a step-by-step guide to carefully disassemble the transmission. |
| Inspecting and Evaluating Components | Thoroughly examine each component for wear, damage, or signs of failure. |
| Rebuilding with Precision and Care | Assemble the transmission using proper torque specifications and recommended procedures. |
| Testing for Performance and Functionality | Install the rebuilt transmission and conduct tests to ensure optimum performance. |
Determining The Need For Transmission Rebuild
The transmission is an essential component of any vehicle, as it transfers power from the engine to the wheels. Over time, however, the transmission may begin to experience issues and require a rebuild. Determining whether or not a transmission rebuild is necessary can save you time, money, and frustration. In this blog post, we will explore the signs and symptoms that indicate the need for a transmission rebuild.
One of the most common indicators that your transmission may need to be rebuilt is if you are experiencing difficulty shifting gears. If you find that your vehicle is slow to respond when you shift into drive or reverse, or if you notice grinding or clunking noises when shifting, these could be signs of internal damage within the transmission. Additionally, if you notice a burning smell coming from the transmission, this could be a sign of overheating, which can lead to further damage and the need for a rebuild.
Another sign that a transmission rebuild may be necessary is if you are experiencing slipping or jerking while driving. Slipping occurs when the transmission shifts into the wrong gear or fails to stay in gear, causing the engine to rev without power being transferred to the wheels. Jerking, on the other hand, occurs when the transmission shifts abruptly, causing the vehicle to lurch forward or backward. Both slipping and jerking can indicate internal damage within the transmission that requires a rebuild.
Gathering The Necessary Tools And Equipment
When it comes to rebuilding a transmission, having the necessary tools and equipment is essential for a successful and efficient job. Without the proper tools, the process can be frustrating and time-consuming, resulting in a less than optimal outcome. Therefore, before starting the transmission rebuild process, it is crucial to gather all the tools and equipment required to ensure a smooth and seamless experience.
One of the most important tools needed for a transmission rebuild is a high-quality transmission jack. This specialized tool is designed to securely hold and lift the transmission, making it easier to disassemble and reassemble the various components. A transmission jack is typically equipped with adjustable brackets and arms to accommodate different types and sizes of transmissions.
In addition to a transmission jack, other essential tools include a torque wrench, socket set, and a variety of screwdrivers. The torque wrench is necessary to apply the correct amount of torque during the assembly process, ensuring that all bolts and nuts are tightened to the manufacturer’s specifications. A socket set with various sizes and types of sockets will come in handy for removing and installing different fasteners throughout the transmission. Lastly, a set of screwdrivers, both flathead and Phillips, will be needed to handle various screws and clips.
- A parts cleaner and brake cleaner are also necessary for cleaning and degreasing transmission components. These cleaning solvents effectively remove dirt, grime, and old lubricants, allowing for a thorough inspection and evaluation of the parts. Additionally, using a parts washer can help prevent contamination and ensure the longevity of the rebuilt transmission.
- Furthermore, it is important to have a good selection of sealants, adhesives, and gasket materials on hand. These materials are used to seal various components and prevent leaks once the transmission is reassembled. Having high-quality sealants and adhesives ensures a reliable and long-lasting seal, avoiding any issues in the future.
| Tools | Equipment |
|---|---|
| Transmission jack | Parts cleaner |
| Torque wrench | Brake cleaner |
| Socket set | Parts washer |
| Screwdrivers | Sealants, adhesives, and gasket materials |
Lastly, having a well-organized workspace and proper safety equipment is crucial to ensure a smooth and safe transmission rebuild process. This includes wearing protective gloves, safety glasses, and having a clean and clutter-free work area. Proper organization and safety precautions not only improve efficiency but also help prevent accidents and injuries during the rebuild process.
Step-By-Step Guide To Disassembling The Transmission
In this blog post, we will provide a step-by-step guide to disassembling the transmission. Disassembling the transmission is an essential part of the rebuilding process. By following these steps carefully, you can ensure that each component is inspected and evaluated accurately.
Before starting the disassembly process, it is crucial to gather all the necessary tools and equipment. This includes basic hand tools such as wrenches, sockets, and screwdrivers, as well as specialized tools specific to your transmission model. Having the correct tools will make the disassembly process easier and more efficient.
Once you have gathered all the necessary tools, it is time to begin the disassembly process. Start by carefully removing the transmission from the vehicle. Ensure that the transmission is securely supported to prevent any accidents or injuries.
- Step 1: Drain the fluid – Before disassembling the transmission, it is important to drain the fluid completely. Locate the drain plug on the transmission pan and carefully remove it. Allow the fluid to drain into a suitable container.
- Step 2: Remove the transmission pan – After draining the fluid, remove the transmission pan. This can usually be done by removing the bolts that secure it to the transmission housing. Carefully lower the pan and set it aside.
- Step 3: Disconnect electrical connections – Identify and disconnect any electrical connections that are attached to the transmission. These connections may include wiring harnesses, sensors, and solenoids. Take care not to damage any of the electrical components.
- Step 4: Remove the valve body – The valve body controls the flow of transmission fluid and directs hydraulic pressure to different components of the transmission. Remove the bolts that secure the valve body to the transmission housing and carefully lift it off.
- Step 5: Disassemble the remaining components – After removing the valve body, continue disassembling the remaining components of the transmission. This includes removing the clutch packs, planetary gears, and any other internal components.
It is essential to disassemble each component carefully and take note of its condition. Inspect for any signs of wear, damage, or debris that could impact the performance of the transmission. Cleaning each component thoroughly is also important to remove any dirt or contaminants.
By following this step-by-step guide to disassembling the transmission, you are well on your way to rebuilding it with precision and care. Remember to label and organize each component as you go to ensure a smooth reassembly process. Stay tuned for our next blog post on inspecting and evaluating the transmission components.
| Tools and Equipment | Steps |
|---|---|
| Basic hand tools (wrenches, sockets, screwdrivers) | Step 1: Drain the fluid |
| Specialized transmission tools | Step 2: Remove the transmission pan |
| Suitable container for fluid drainage | Step 3: Disconnect electrical connections |
| – | Step 4: Remove the valve body |
| – | Step 5: Disassemble the remaining components |
Inspecting And Evaluating The Transmission Components
Inspecting and evaluating the transmission components is a crucial step in the process of rebuilding a transmission. This step helps in identifying any damaged or worn-out parts that need to be replaced. It also ensures that the rebuilt transmission functions properly and provides optimal performance. To inspect the transmission components, you need to follow a systematic approach and pay attention to both external and internal parts of the transmission.
Firstly, start by visually inspecting the exterior of the transmission. Look for any signs of leakage or cracks in the housing. Check the condition of the seals, gaskets, and bolts. These external components play a crucial role in preventing fluid leaks and maintaining the integrity of the transmission. Replace any damaged or worn-out seals and gaskets to ensure a proper seal and prevent future issues.
Next, move on to inspecting the internal components of the transmission. Begin by removing the transmission pan to access the filter and fluid. Check the condition of the filter for any signs of debris or clogging. A clogged filter restricts the flow of transmission fluid and can lead to various issues. If necessary, replace the filter to ensure proper fluid flow and prevent contamination.
- Inspect the clutch plates and bands for wear and tear. These components are responsible for transferring power within the transmission. Replace any heavily worn or damaged clutch plates and bands to ensure smooth shifting and optimal performance.
- Check the gears and shafts for any signs of excessive wear or damage. Look for chips, cracks, or uneven wear patterns on the gear teeth. Replace any damaged gears or shafts to prevent transmission failure.
- Examine the bearings and bushings for any signs of wear or looseness. Worn-out bearings can cause noise, vibration, and premature failure of the transmission. Replace any worn-out bearings and bushings to ensure proper alignment and smooth operation.
Lastly, inspect the valve body and the solenoids. These components play a crucial role in controlling the flow of fluid and the shifting of gears. Look for any signs of contamination or damage to the valve body and solenoids. Clean or replace these components as necessary to restore proper function and avoid shifting problems.
| Transmission Component | Inspection Criteria | Action |
|---|---|---|
| Seals and Gaskets | Check for cracks or signs of leakage | Replace if damaged |
| Filter | Inspect for debris or clogging | Replace if necessary |
| Clutch Plates and Bands | Look for wear and tear | Replace if heavily worn or damaged |
| Gears and Shafts | Check for chips, cracks, or uneven wear patterns | Replace if damaged |
| Bearings and Bushings | Inspect for wear or looseness | Replace if worn-out |
| Valve Body and Solenoids | Look for contamination or damage | Clean or replace as necessary |
By thoroughly inspecting and evaluating the transmission components, you can identify any potential issues and address them before reassembling the transmission. This ensures that the rebuilt transmission functions properly and delivers optimal performance and longevity. Remember to follow manufacturer guidelines and use precision and care throughout the inspection process.
Rebuilding The Transmission With Precision And Care
When it comes to rebuilding a transmission, precision and care are essential to ensure a successful outcome. The transmission is a complex system that plays a crucial role in the overall performance of a vehicle. Therefore, it is important to approach the rebuilding process with utmost attention to detail.
One of the key steps in rebuilding a transmission is disassembling it. This involves carefully taking apart all the components and organizing them in a systematic manner. By doing so, it becomes easier to inspect and evaluate each component individually, identifying any damages or wear and tear. By following a step-by-step guide during the disassembly process, it helps ensure that no crucial parts are overlooked or misplaced.
Once the disassembly is complete, the next step is inspecting and evaluating the transmission components. This involves thoroughly examining each part for any signs of damage or excessive wear. It is crucial to have a keen eye for detail during this stage, as any unnoticed issues can lead to future complications. By using specialized tools and equipment, such as measuring instruments and visual inspection aids, one can accurately assess the condition of each component.
After the inspection, it is time to rebuild the transmission with precision and care. This entails replacing any damaged or worn-out parts and reassembling the components in the correct order. It is crucial to follow the manufacturer’s guidelines and specifications during the reassembly process to ensure the transmission functions optimally. Proper torquing and tightening of bolts and fasteners, as well as using appropriate sealing materials, are vital steps to guarantee a reliable and durable rebuild.
Finally, testing the rebuilt transmission for performance and functionality is essential to ensure its proper operation. This involves installing the transmission back into the vehicle and conducting various tests, such as test-driving and checking for any leaks or abnormal noises. Making adjustments as necessary and addressing any issues that arise during testing ensures a high-quality rebuild that meets the desired performance standards.
Testing The Rebuilt Transmission For Performance And Functionality
Once you have successfully completed the process of rebuilding the transmission with precision and care, the next crucial step is to test the rebuilt transmission for performance and functionality. This step ensures that the transmission is in optimal working condition and ready to be installed back into the vehicle. Testing the rebuilt transmission will involve various performance assessments to check the reliability, efficiency, and overall functionality of the transmission before it is put to use.
One of the key tests to perform on the rebuilt transmission is a road test. This test involves taking the vehicle out on the road and driving it under different conditions to see how the transmission responds. During the road test, the transmission should shift smoothly through all gears, including accelerating and decelerating smoothly without any jerkiness or hesitation. Additionally, the transmission should engage the gears promptly and smoothly without any clunking noises or grinding sensations.
Another important test to conduct is the stall test. This test is designed to evaluate the torque converter’s efficiency and the overall performance of the transmission under load. To perform the stall test, the vehicle is put into gear and the brake is applied firmly. The accelerator is then gradually applied to gauge how well the transmission holds the vehicle in place without slipping. If the transmission slips, it indicates a problem that needs to be addressed.
- Furthermore, it is essential to conduct a fluid pressure test to ensure that the rebuilt transmission is operating within the proper pressure range. This test involves using a transmission pressure gauge to measure the pressure at various points in the transmission system. The pressure readings should match the manufacturer’s specifications. Deviations from the recommended pressure range can indicate internal leaks or other issues that may affect the transmission’s performance and functionality.
| Test | Objective | Outcome |
|---|---|---|
| Road Test | Evaluate shifting, acceleration, and overall performance under real-world conditions. | Smooth shifting, no jerks or hesitation, prompt gear engagement. |
| Stall Test | Assess torque converter efficiency and transmission performance under load. | No slipping, smooth holding of the vehicle without excessive slippage. |
| Fluid Pressure Test | Determine if the transmission operates within the recommended pressure range. | Pressure readings within the specified range, indicating no leaks or abnormalities. |
By conducting these tests and ensuring that the rebuilt transmission passes each one, you can have confidence in its performance and functionality. It is crucial to carry out these tests meticulously as any issues identified during testing should be addressed promptly. Testing the rebuilt transmission allows you to verify the success of the transmission rebuild and make any necessary adjustments before installing it back into the vehicle, ensuring a smooth and problem-free driving experience.
Frequently Asked Questions
Question 1: What are the signs that indicate the need for a transmission rebuild?
Common signs that suggest the need for a transmission rebuild include slipping gears, delayed engagement, rough shifting, fluid leaks, and unusual noises. If you experience any of these issues, it is recommended to consult a professional for a thorough inspection.
Question 2: What tools and equipment are required for a transmission rebuild?
Some essential tools and equipment for a transmission rebuild include a torque wrench, socket set, seal removal tool, transmission jack, bearing puller, snap ring pliers, and a transmission rebuild kit containing gaskets, seals, and clutches. It is important to have the appropriate tools to ensure a successful rebuild.
Question 3: What is the step-by-step process of disassembling a transmission?
The process of disassembling a transmission involves removing the transmission pan, filter, valve body, input shaft, output shaft, planetary gear sets, and other components. It is crucial to follow a detailed guide or seek professional assistance to avoid damaging any parts and to keep track of the disassembled components.
Question 4: How do you inspect and evaluate the transmission components during a rebuild?
During a transmission rebuild, the components should be carefully inspected for wear, damage, or excessive clearances. This may involve measuring clearances, checking for burnt or discolored clutches, and inspecting bearings and seals. Thorough evaluation helps identify the components that need to be replaced or repaired.
Question 5: What is the importance of rebuilding a transmission with precision and care?
Rebuilding a transmission with precision and care is crucial to ensure proper functionality and longevity. Each component should be assembled correctly, adhering to recommended torque specifications and alignment. Attention to detail and careful assembly can prevent future issues and improve the overall performance of the transmission.
Question 6: How is a rebuilt transmission tested for performance and functionality?
A rebuilt transmission is typically tested by checking for proper gear engagement, smooth shifting, and the absence of any leaks or abnormal noises. Additionally, some professionals may perform road testing to evaluate the transmission’s performance under real-world conditions. Thorough testing helps ensure that the rebuilt transmission functions optimally.
Question 7: Can a transmission rebuild fix all transmission problems?
While a transmission rebuild can address many common transmission problems, it may not be able to fix all issues. In some cases, extensive damage or internal mechanical failures may require a complete replacement of the transmission. It is important to consult with a professional to determine the most suitable solution for your specific transmission problem.